Creating a customized root for the Content Editor
Note: This is a port of an old post from a previous blog, originally written to target Sitecore 6.3, though it still applies as of Sitecore 7.5. Whilst it is now not such a new subject, it may still prove useful to some. As Sitecore 8 has all the editors ported to SPEAK, it is unlikely that this method will work from that version onwards.
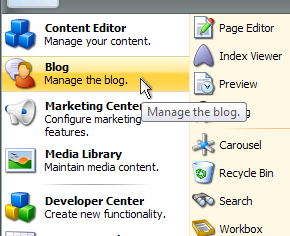
Have you noticed how the Marketing Center icon in the Sitecore Start Menu is just used to load a new Content Editor window, but with a particular root item? In that particular case it goes straight to /sitecore/system/Marketing Center.
It’s quite a simple addition but can speed up work for your editors if they’re able to use an icon to launch straight into an area they regularly work with, especially if it’s tucked away in your content tree. Additionally, if you’ve removed access for them to one of the ancestor items, they won’t see it in the standard Content Editor tree at all, even if they have access to that particular descendant.
This short tutorial shows you how to create a new shortcut to launch a Content Editor with a customized root item of your choice.
Creating the layout
First of all, you’ll need to create a page that will get shown when the window opens. I have based the code for this Layout on the very same code used by the Marketing Center, no point in reinventing the wheel. All the code really does is launch the real Content Editor ASPX page, complete with some URL parameters to have it open the right item.
Create an ASPX page and fill it with the following, though replace the ID passed to Client.ContentDatabase.GetItem with the ID of the root item you want to be displayed when the window opens. You can also customize the he and ic parameters to give the new window a custom URL + icon.
|
|
Save this ASPX file where you like, you may prefer to go somewhere within the /sitecore folder, or perhaps the /sitecore modules folder instead to keep it separate.
Next, create a new Layout item in the Core database. I would recommend following Sitecore’s pattern and keeping it under the Applications folder located at /sitecore/layout/Layouts/Applications, or perhaps use a subfolder with your project name. The Path field of this layout should be a relative path to your new ASPX page.
Creating the application
Now you need to create an Application that uses this layout. Create a new Application item under /sitecore/content/Applications, if you right-click on the Applications item you should find that an Insert Option has already been defined for adding an Application.
In this new item, set the Chrome field to BorderlessChrome, otherwise the window won’t display correctly. The Icon field will control how the Application will appear in the Start Menu later, use a 32x32 icon. You can also set the Display Name and Tool Tip fields.
Next, edit the Presentation Details of the item and set the layout to your newly created layout from the previous setup.
Creating the shortcut
Finally, you need to create the shortcut. Under /sitecore/content/Documents and settings/All users/Start menu are several items that represent the different areas of the Start Menu. Choose the one where you would like your icon to appear and create a new item of type /sitecore/templates/Sitecore Client/Applications/Application shortcut (you should find it as an Insert Option).
In the shortcut item, set the Application link field to point to your Application item. If you want a particular shortcut to override the default settings for an Application, you can also set the Icon, Display Name and Tool tip fields.
Tada!
That’s all there is to it, your new shortcut should be appearing in the Start Menu, and when you click it you’ll get your new customized Content Editor.
